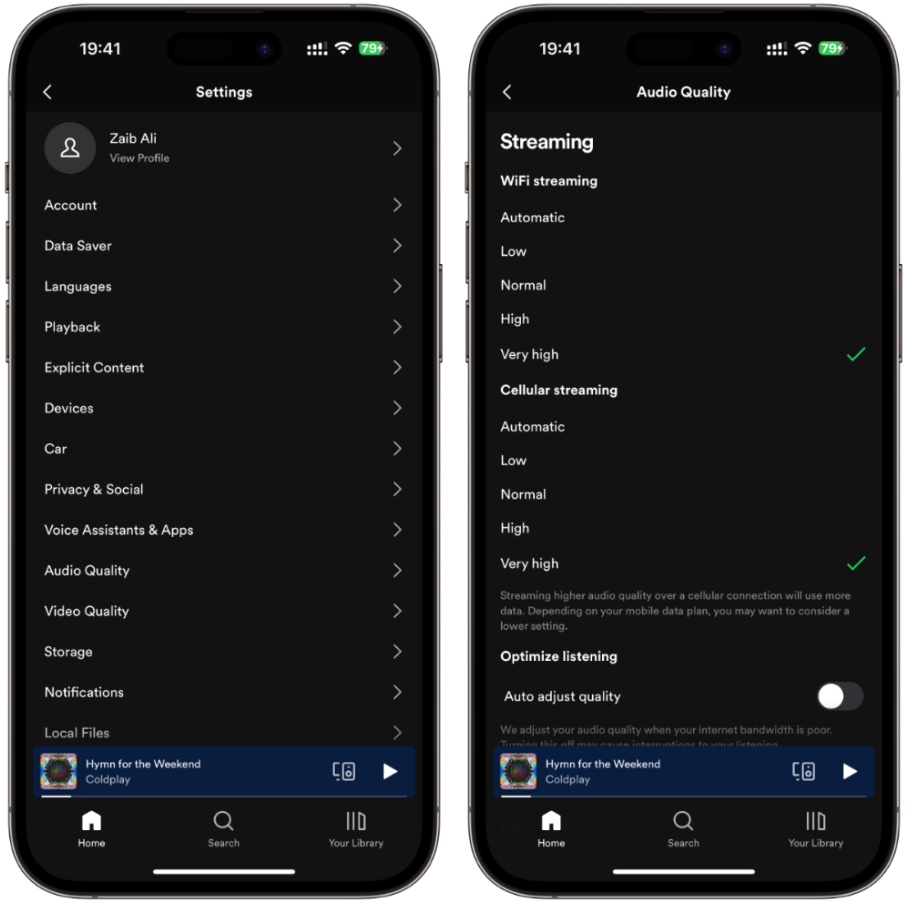
If you are on the team Spotify when it comes to streaming music on your iPhone, then it is a good idea to change some Audio Quality settings on the Spotify app. Doing so can greatly improve your music listening experience on the streaming service.
Within the Spotify app users have the option to choose between different streaming audio quality for WiFi and Cellular. So depending on the bandwidth that is available on your cellular plan, you can choose the audio quality that suits you the best.
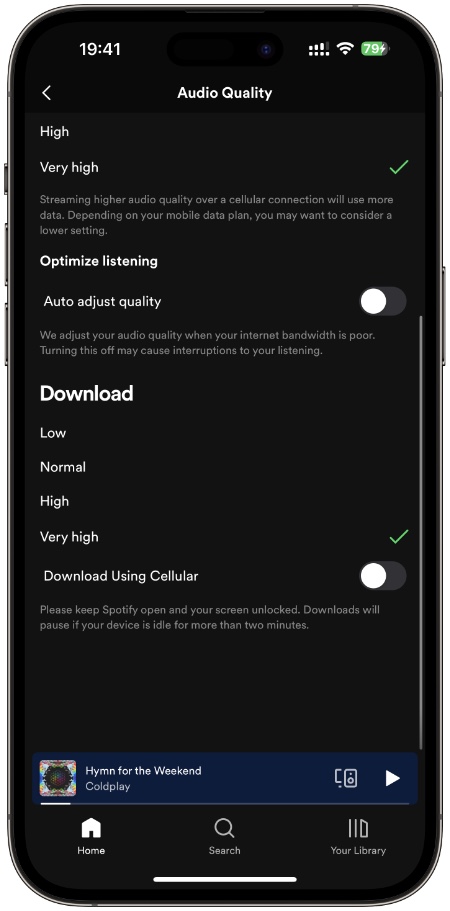
From the same settings menu, you can also choose the quality of Downloads. Remember choosing a higher audio quality for downloading music will use up more disk space on your device.
Subscribed to Apple Music? Here’s how you can stream music at higher quality on Apple Music.
Improve audio quality for streaming on Spotify for iOS
Follow the steps below to select your desired audio quality for Spotify audio streaming.
Step 1. On your iPhone launch the Spotify app.
Step 2. On the ‘Home‘ tab tap on the Settings button (the one with gear icon) found on top right corner of the screen.
Step 3. On the Settings menu find and tap on ‘Audio Quality‘ option.
Step 4. On the next screen choose between Automatic, Low, Normal, High or Very High for WiFi and Cellular streaming.
Step 5. To change the quality of downloaded songs scroll down and under ‘Download‘ heading choose between Low, Normal, High or Very High.
There you have it folks, this is how you can change the audio quality of music streaming on Spotify’s iPhone app. By performing these steps you can greatly improve the audio quality for Spotify.
If you have any questions regarding this guide, then let us know in the comments below.


