


Taking a screenshot from your iPhone or iPad can often become necessary or even priority in certain situations. For instance, instead of watching a ten-minute-long cooking video, a screenshot of the written recipe in the description can save you time.
Plus, screenshots also help you to keep a certain part of a long chat saved, or simply capture an image that can’t be downloaded.
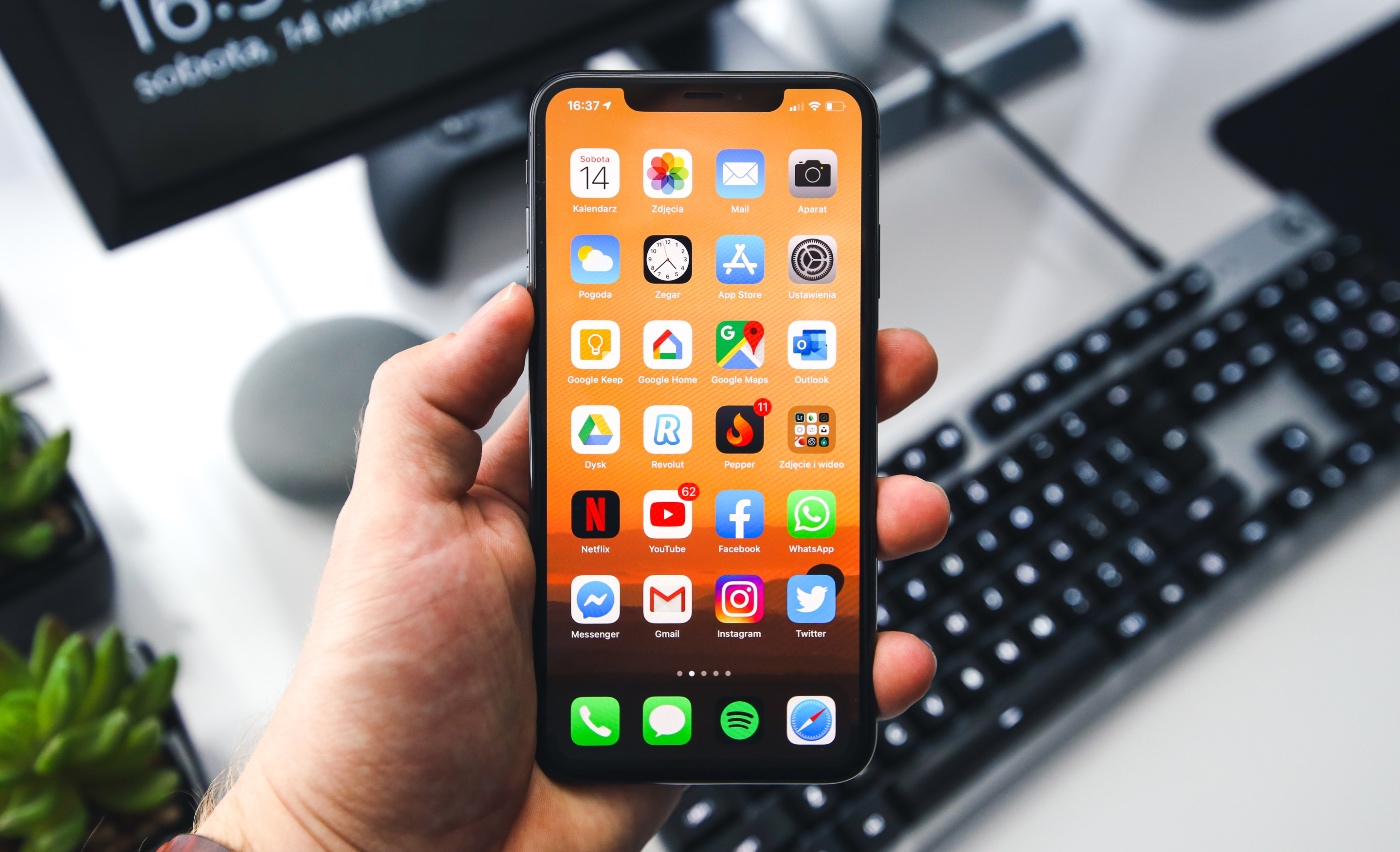
You can either take a screenshot using Touch ID or Face ID on iPhone or iPad. However, these methods vary from model to model.
Take Screenshot On iPhone 13, 12, 11, and X
Follow these instructions to screenshot iPhone 13, iPhone 12, iPhone 11 and iPhone X. Any iPhone that does not have a home button allows users to screenshot using the steps below.
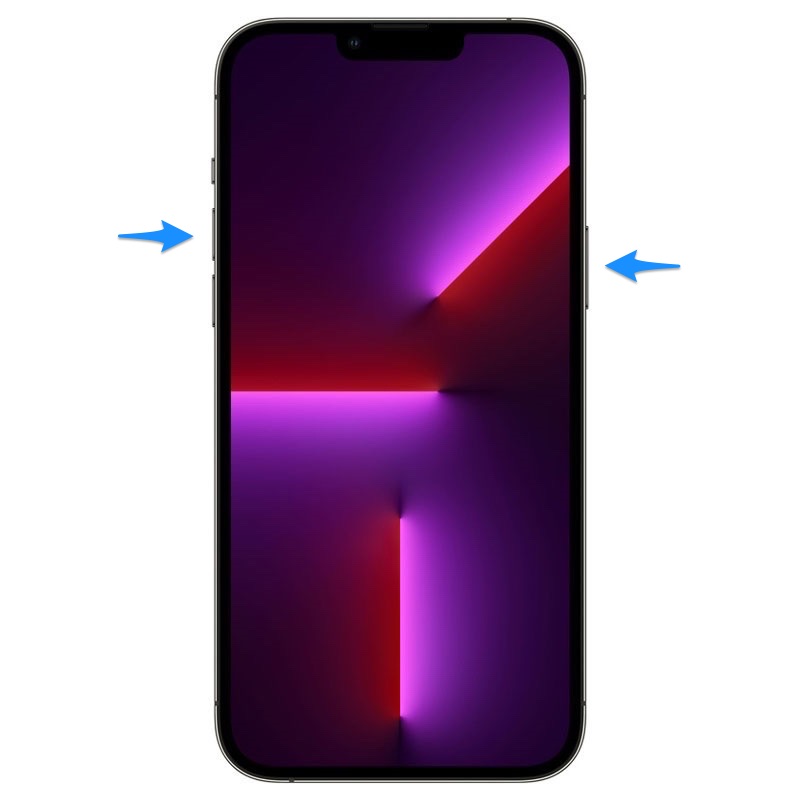
Step 1. Go to the screen you wish to take a screenshot be it an app, the lock screen or the home screen.
Step 2. Now press the Power/Side Button and the Volume Up button simultaneously.
Step 3. Release both the buttons together quickly.
The screen of your iPhone will flash white, and if your phone is on Sound Mode you will be able to hear a camera click as well.
A screenshot thumbnail will appear on the lower left side of the screen. Either swipe it left or dismiss it or if you want to make changes like, crop, edit, markup, etc.
If you want to save the screenshot in the Photos just wait for a few seconds until the thumbnail disappears.
Take Screenshot on iPhone SE, iPhone 8, and Other Home Button Devices
All models of iPhone SE, iPhone 8, and all previous models like iPhone 7, 6, 5, etc., have a Home button on the front. This is how you can screenshot on these devices.
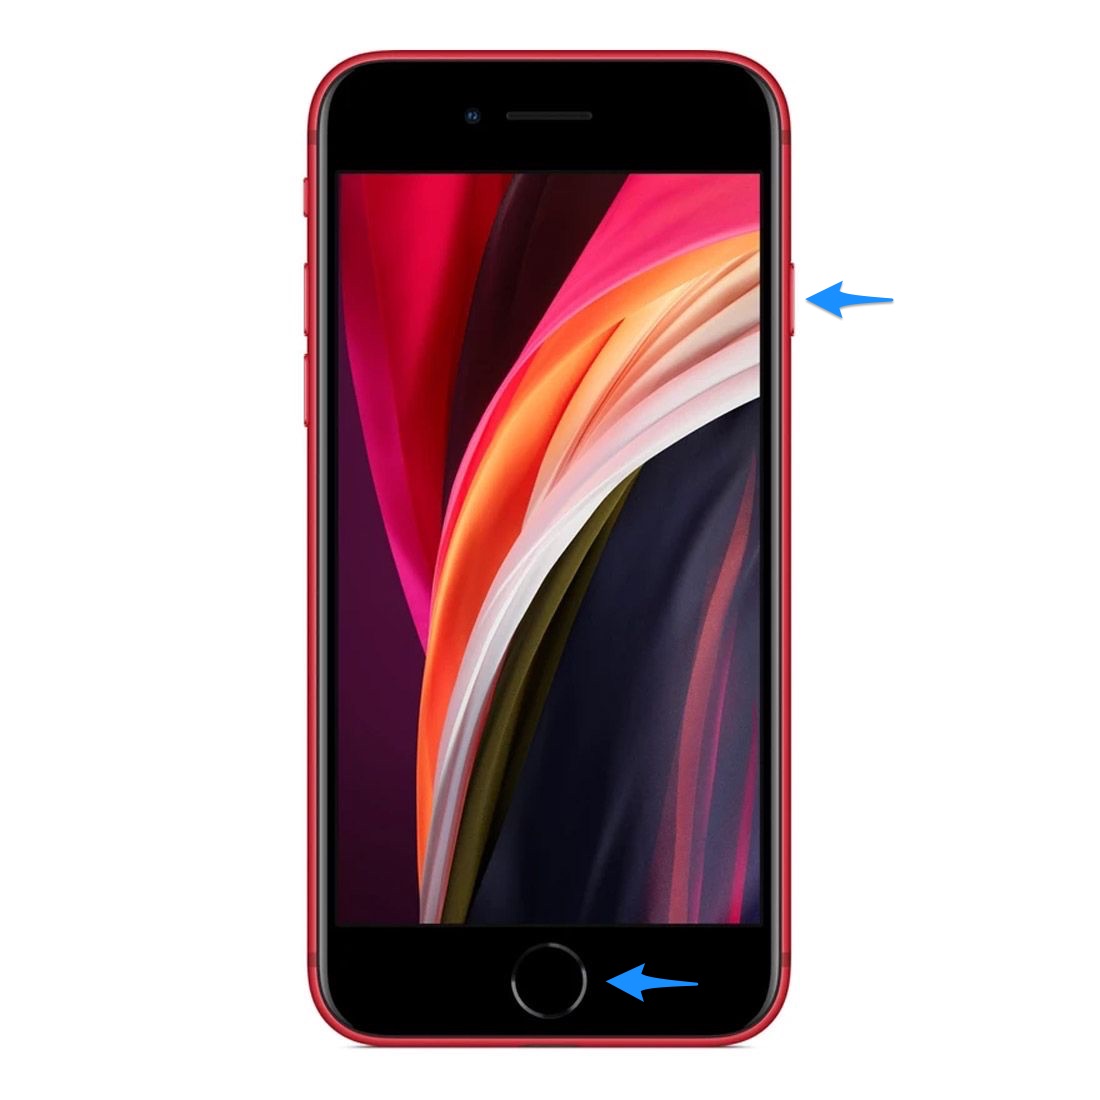
Step 1. Navigate to the screen you want to capture. This can be any web browser or a piece of information you found online.
Step 2. Press and hold the Home button and the Power/Side button at one go.
Step 3. Next, release both buttons.
The screen of your iPhone will flash white, and you will hear the sound of the camera shutter if your sound mode is enabled.
If you wish to edit the screenshot tap on the thumbnail that appeared on the screen or just ignore to save it to Photos.
Take Screenshot on iPad Pro Face ID, iPad mini 6 and iPad Air 4 and 5
Recent models of iPads have amazing features including, Face ID. These gadgets don’t have Home Button but thin edge-to-edge bezels. Therefore the way of taking a screenshot is quite similar to an iPhone with Face ID.
Here’s how you can screenshot iPad Pro, iPad mini and iPad Air.

These steps are for iPad Pros with Face ID, iPad mini 6 and iPad Air 4 and 5.
- Hit the power button and the Volume Up button on the iPad at once.
- Release both buttons quickly.
The screen will be flashed white followed by a shutter sound if your phone isn’t on silent mode. You will see a screenshot thumbnail in the lower-left corner of the screen. Tap it if you want to make changes or ignore it if you want to save it as it is.
How to Take a Screenshot on iPad with Touch ID
iPads and iPhones have a Home Button so the way of taking the screenshots on both devices is quite similar.
These steps apply on all iPads with home button including iPad 10.2-inch, iPad Air with home button, iPad mini with home button and iPad Pros with home button. Older iPhone models also work the same way.
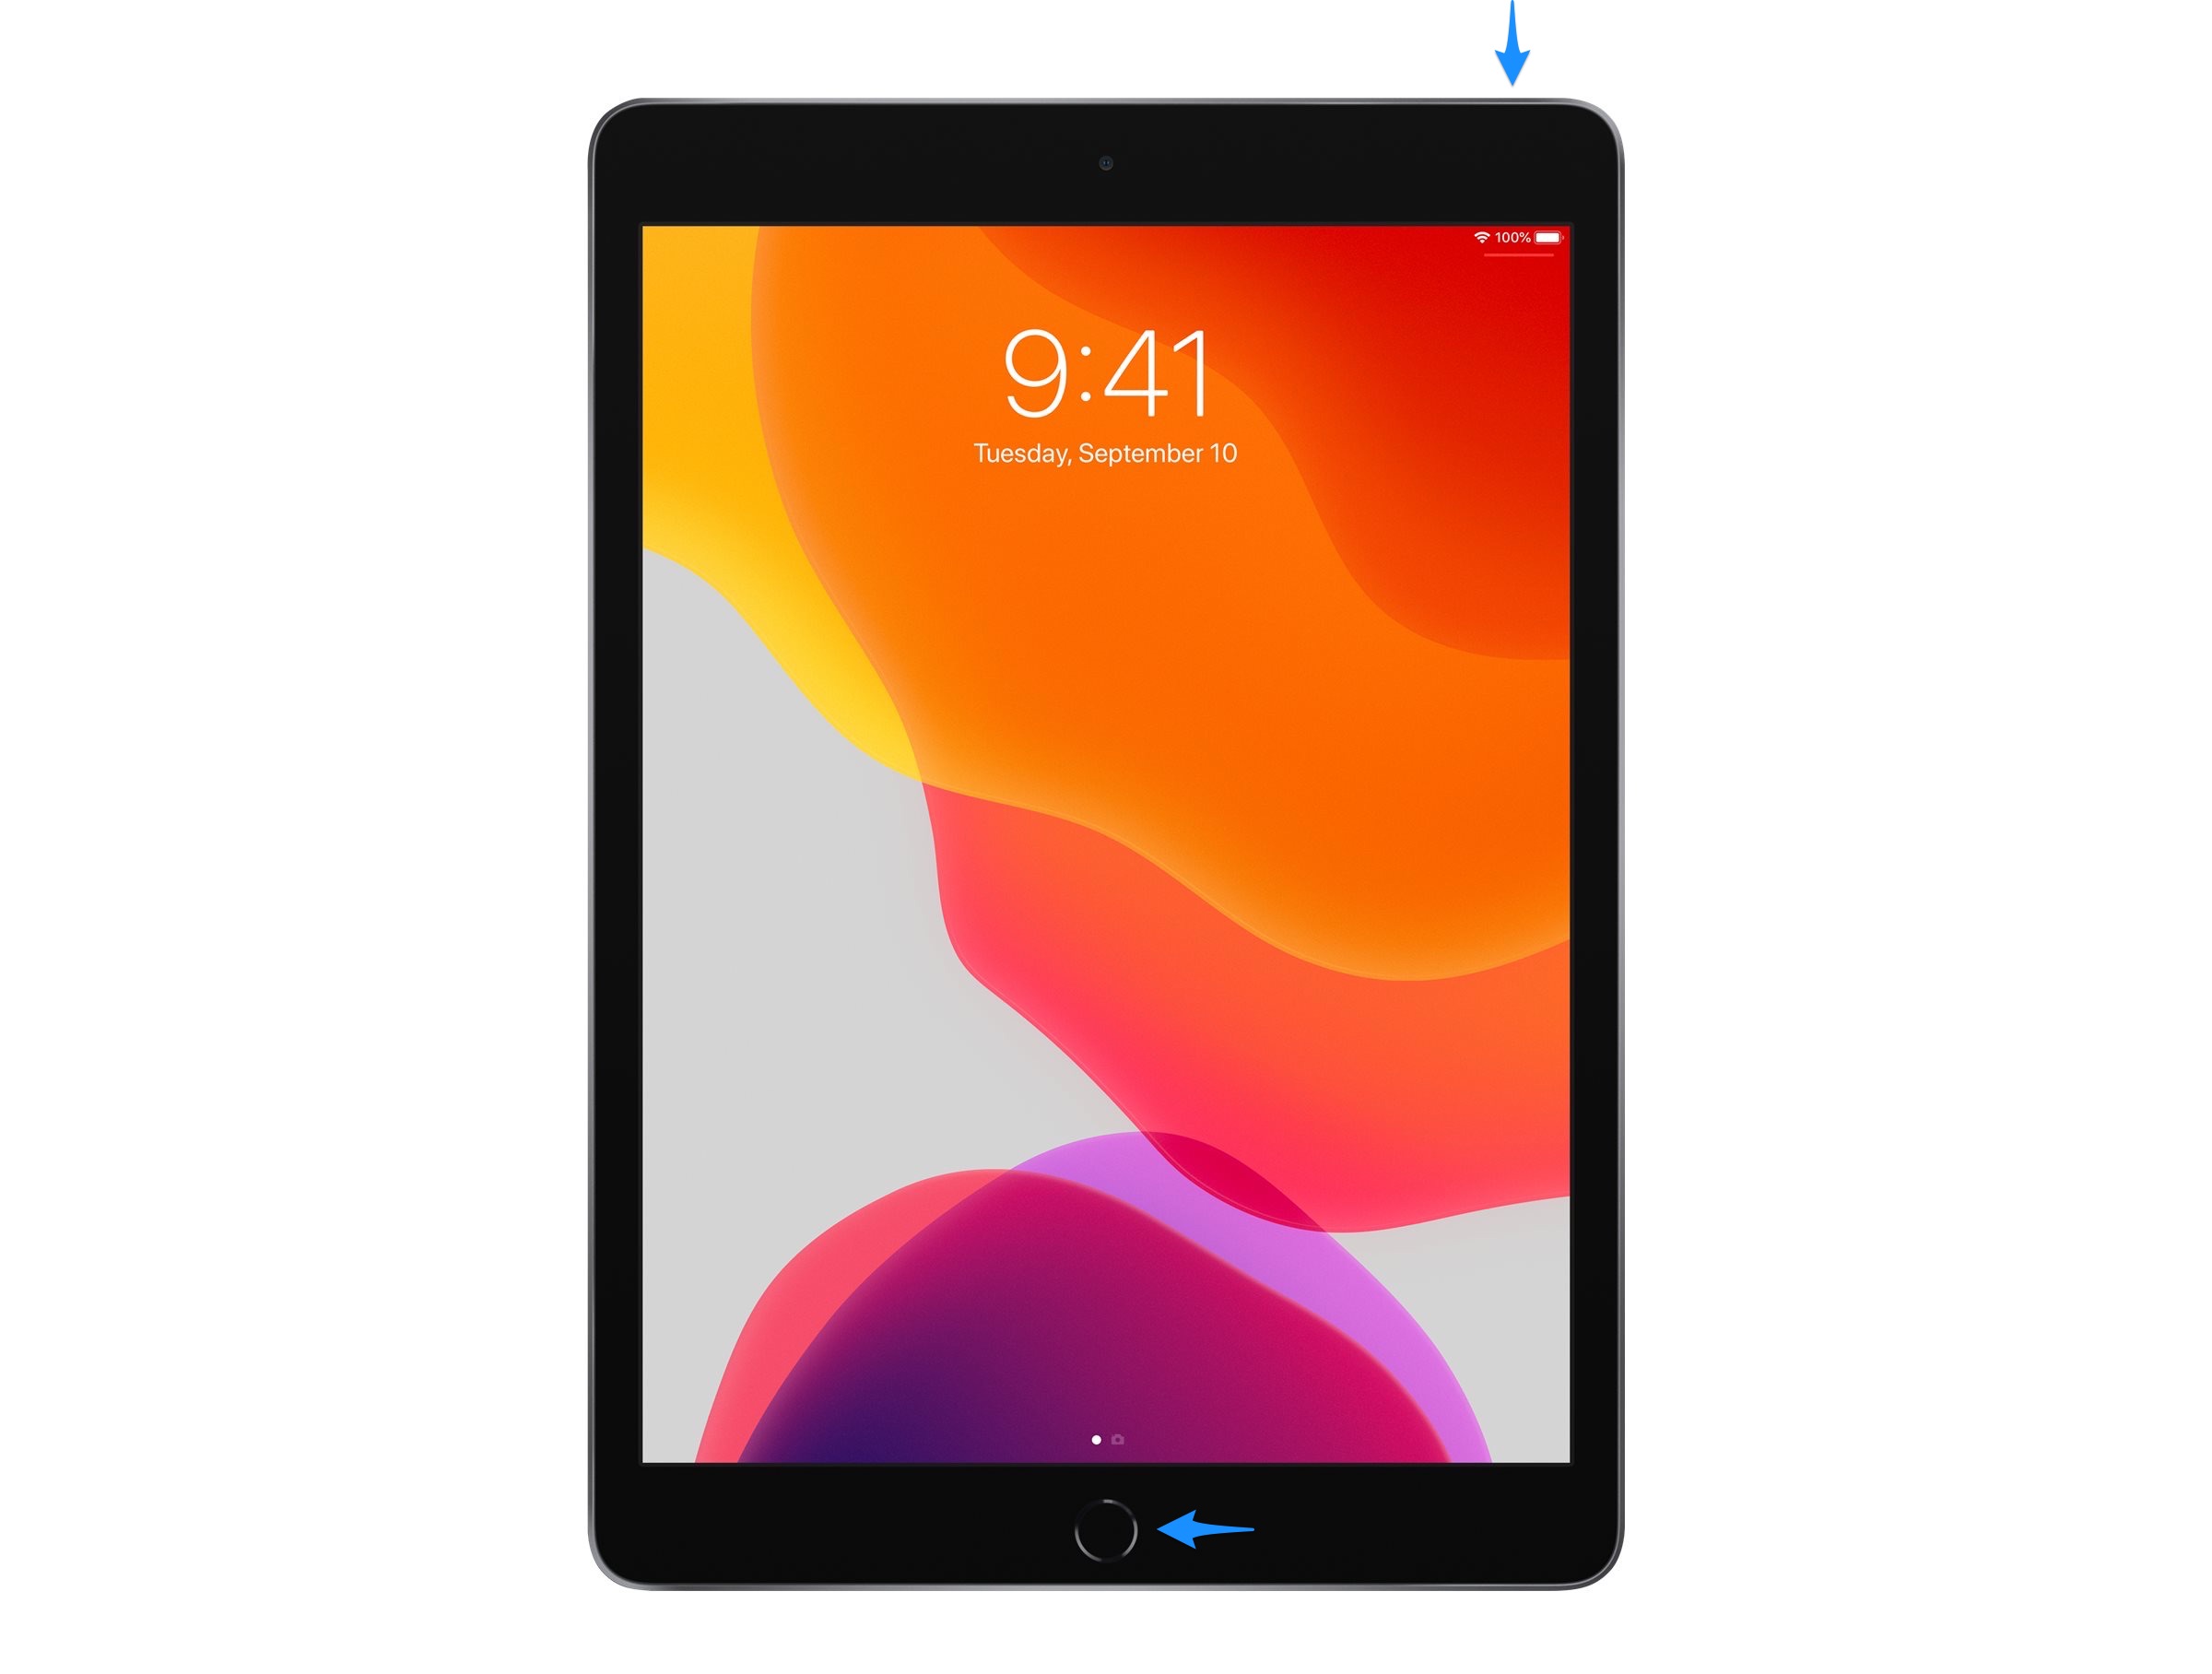
Follow these simple steps:
- Press the button on Power/Top and the Home button at the same time.
- Quickly release both buttons at the same time.
The iPad screen will flash, and you will hear a camera shutter sound. Either tap on it or swipe left to dismiss.
View Screenshots on iPhone and iPad
The screenshots taken from your iPhone or iPad automatically get saved to Photos app on your device.
Additionally, in the Albums folder, you can see the Screenshots album as you scroll down. It collects all your screen captures and displays them to you in one place.
In a Nutshell
Capturing screenshots on your iPad and iPhone is quite convenient and almost the same in all models. Just follow the aforementioned steps accurately.
For any other queries, please reach out to us using the comments section below. We will be happy to help you out!

