


In this guide, we will help you in making your iPhone more secure in 2026. Here you will find details about the iPhone’s security features and instructions on how you can use them to your advantage against thieves and hackers.
Table of Contents
- Make iPhone More Secure With These Steps
- 1. Turn On Stolen Device Protection
- 2. Set a strong passcode
- 3. Make sure Find My iPhone is enabled
- 4. Disable access to certain features when the iPhone is locked
- 5. Turn on Mail Privacy Protection
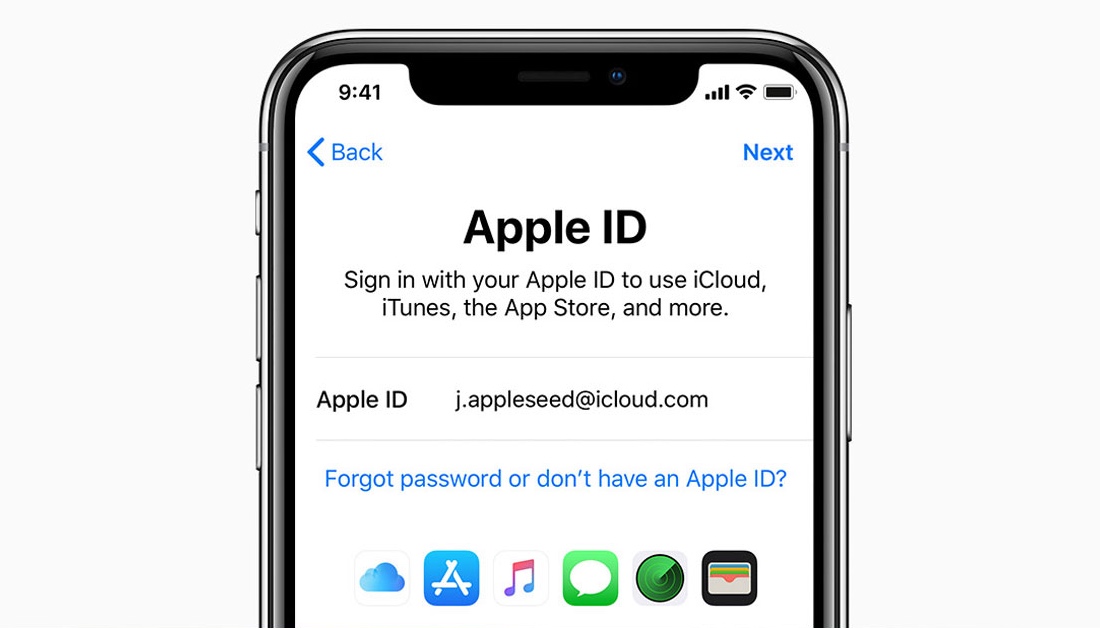
- 6. Never Share your Apple ID with others
- 7. Enable iCloud Private Relay
- 8. Turn On Erase Date Option
- 9. Turn On LockDown Mode
iPhones running iOS 17 or later are equipped with security features that can protect your privacy and your data. However many of these features are not enabled by default or require some tweaking before they can be effectively used against thieves and hackers.
You can learn what each of the security features of iOS does and how you can activate them on your iPhone running iOS 17 or later.
Make iPhone More Secure With These Steps
Before you begin, make sure your iPhone is running the latest available version of iOS as running the up-to-date version of iOS not only makes your device more secure but will also make sure that all the features that we have mentioned in this article are available on your device.
1. Turn On Stolen Device Protection
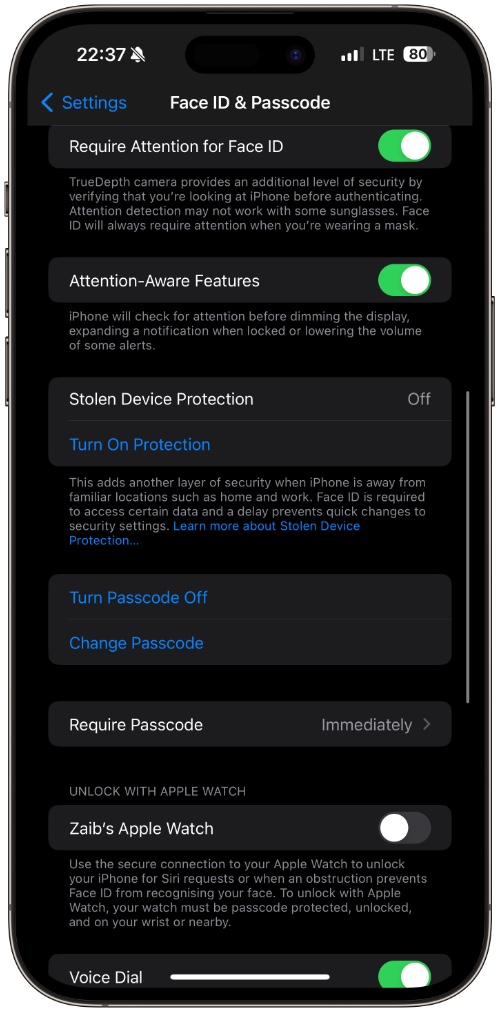
If you are running iOS 17.3 or later, and don’t want a thief to gain access to your iPhone, and as a result access your private data then you need to enable the Stolen Device Protection security feature on your iPhone.
This is a fairly new iOS feature that adds a layer of security to the iPhone. It does so by requiring the user to scan his or her face with Face ID or scan a finger on Touch ID devices to access certain data and make changes like changing the device’s passcode or Apple ID password. This is super useful in situations when someone has stolen your iPhone and knows your passcode.
Enabling this setting is extremely crucial as without it anyone who has access to your device and knows its passcode can lock you out of your Apple account and gain access to all accounts whose passwords are stored in iCloud Keychain.
You can turn on Stolen Device Protection by following these steps.
- On your iPhone open Settings.
- Go to Face ID & Passcode (On iPhones with Touch ID this option will be labeled as Touch ID & Passcode).
- Scroll down and tap on the Turn On Protection option.
2. Set a strong passcode
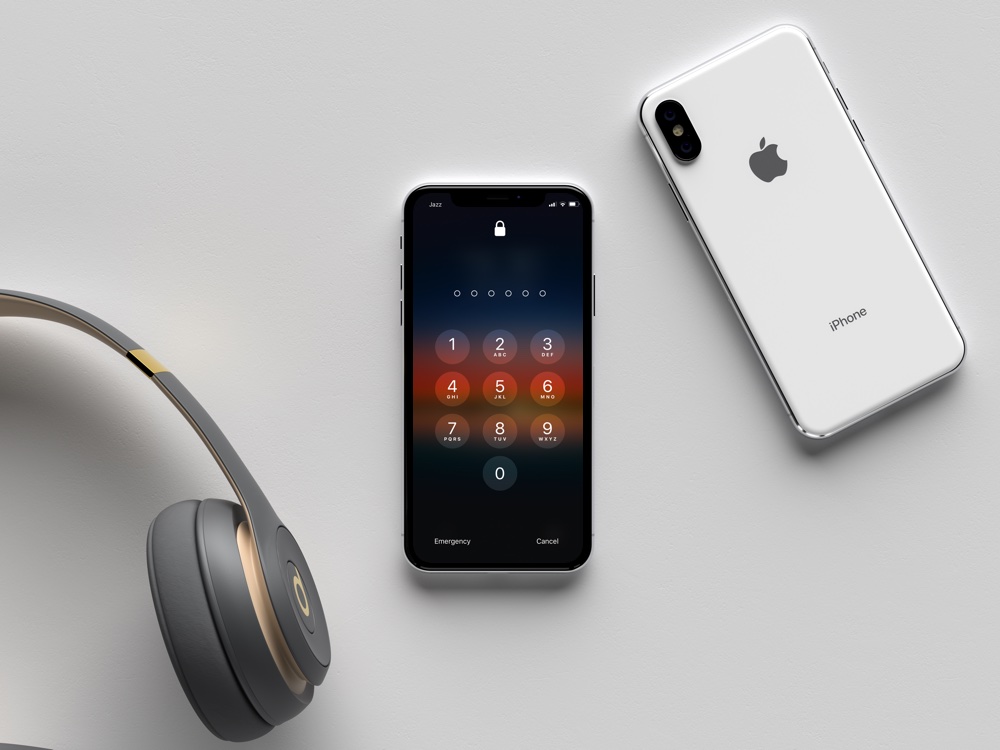
The next thing you want to do to secure your iPhone is choose a strong passcode. This simple step goes a long way toward keeping hackers and thieves out of your iPhone and away from sensitive data.
While it is recommended to use Alphanumeric passcodes on your iPhone that are made with a combination of letters and numbers, the least you can do is use non-sequential 6-digit passcodes. So instead of using something like ‘123456’ or ‘258258’ use something like ‘267314’.
You can set a more secure passcode on your iPhone by following these steps.
- Open Settings and go to the Face ID and Passcode option.
- Now tap on the Change Passcode option.
- On the next screen tap on ‘Passcode Options’ and select ‘Custom Alphanumeric’ passcode or ‘6-digit passcode’ option.
3. Make sure Find My iPhone is enabled

Find My iPhone is an essential tool that proves invaluable when you end up losing your iPhone or it gets stolen.
Find My not only enables you to locate your iPhone on the map but it also gives you the ability to remotely wipe your device. It also enables Activation Lock, which prevents anyone else from using your stolen iPhone without entering your Apple ID password. Lost Mode also lets you display a message and phone number on the lock screen so anyone who finds your device can contact you to return the device.
- You can enable Find My by going into Settings and tapping on your name from the top.
- Then on the next screen tap on Find My and then on Find My iPhone.
- Finally, you can enable the toggles next to Find My iPhone and Find My Network settings.
Also, make sure to enable the Send Last Location toggle so your iPhone’s last location is sent to Apple when its battery is critically low.
4. Disable access to certain features when the iPhone is locked
You can boost the security of your iPhone by disabling access to certain features while the device is locked. When you disable them these features will only become available after the device has been unlocked, preventing unauthorized access to these features.
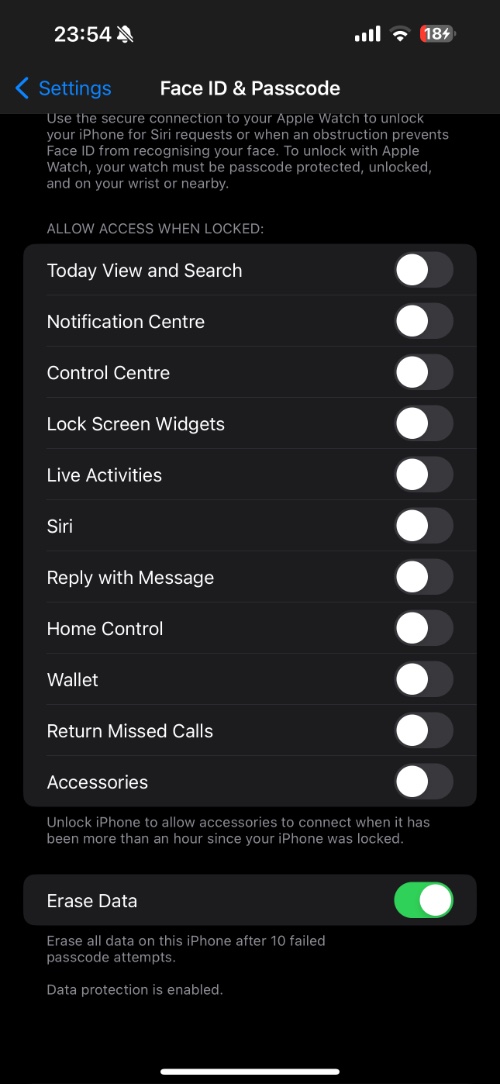
You can go to the Face ID & Passcode section of the Settings app and scroll down. There make sure you disable toggles for the following options.
- Notification Center
- Control Center
- Lock Screen Widgets
- Live Activities
- Siri
- Reply with Message
- Wallet
- Return missed calls
- Accessories
Disabling these features will make your iPhone more secure and help prevent hacking.
5. Turn on Mail Privacy Protection
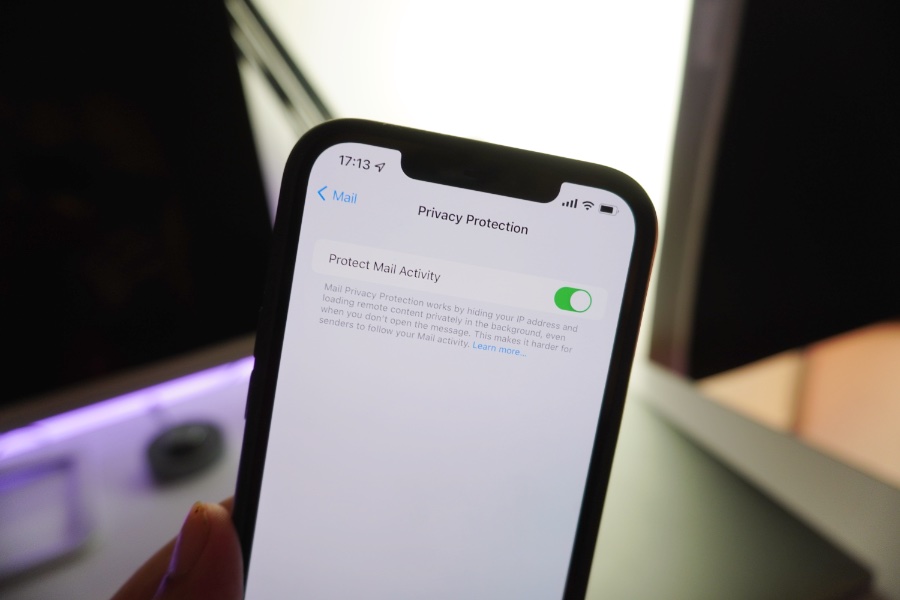
To boost security on iPhone it is recommended that you enable the Mail Privacy Protection feature.
To enable it go to the Mail section of the Settings app and tap on Privacy Protection.
When this feature is enabled, the stock Mail app will hide your IP address when you open emails. In addition to that it will load remote content in emails privately in the background.
This makes it harder for senders to follow your mail activity and makes your iPhone and mail accounts more secure.
6. Never Share your Apple ID with others
This one is obvious however it is important to stress this point as many people end up sharing their Apple ID details with family and friends, which makes the account more vulnerable.
An Apple ID holds the key to your iPhone and your data. So it is extremely important to not only use a strong and unique password for it but also avoid sharing its details with other people.
For people who want to share their app and media purchases among family members, Apple offers Family Sharing features that let you share your purchases without sharing your Apple ID with other people.
7. Enable iCloud Private Relay

iCloud+ subscribers can enable the iCloud Private Relay feature and make using the internet on iPhone more private. When this feature is enabled iOS prevents websites and network providers from creating a detailed profile about you.
When you enable iCloud Private Relay the traffic web data from your iPhone is encrypted and sent through two separate internet relays. This helps in hiding your IP address and your location and thus keeps your browsing activity in Safari browser more secure.
You can enable iCloud Private Relay by following these steps.
- On your iPhone open Settings and tap on your name.
- On the next page tap on the iCloud option.
- Next select Private Relay and turn it on by switching this toggle.
8. Turn On Erase Date Option
The next step to make the iPhone more secure involves enabling the Erase Data option. When this setting is enabled iOS will automatically erase all data on your iPhone after 10 failed passcode attempts. This security feature is designed to prevent hackers from gaining access to your iPhone using the Brute Force technique.
You can enable the Erase Data option by following these steps.
- On your iPhone open Settings.
- Go to the Face ID & Passcode section of the Settings app.
- Find the toggle for Erase Date and turn it on.
9. Turn On LockDown Mode
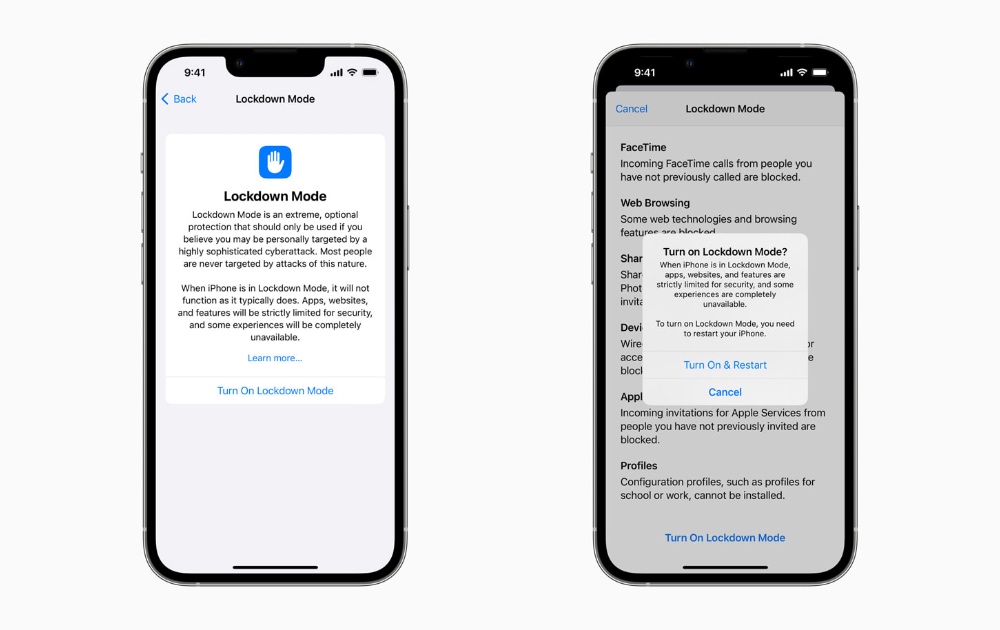
The Lockdown mode is an extreme measure and is only meant for those who believe they might be targets of highly sophisticated and targeted cyberattacks. When this feature is enabled iPhone protects you from hacking by strictly limiting apps, websites, and features on the iPhone while other experiences won’t be available to the user at all.
This includes blocking of attachments in the Messages app, blocking of certain complex web technologies in Safari, blocking of FaceTime calls from people you have not contacted before, removal of location data from shared photos, and more. You can learn more about the Lockdown mode by visiting the links in the description.
Lockdown Mode is available on iPhones running iOS 16 or later. Lockdown Mode can be enabled by following these steps.
- Open Settings and go to the Privacy & Security section.
- There scroll down and tap on Lockdown mode.
- You can set up Lockdown Mode from the next screen.
And that’s it. This is how you can make your iPhone more secure and prevent hackers and thieves from stealing your data and gaining access to your device.

